Access to better analytics should not be a spooky exercise. Fair Marketing shares pointers on understanding Google Tag Manager hierarchy.
Here’s how you set up a GTM account, create your first tags and triggers, and use the platform to streamline your tracking setup process.
Ever submitted a development ticket for what you believed to be a straightforward tracking code update? And then awaited the task’s completion for weeks?
By enabling you to create tracking tags for analytics and ad platforms using a single, intuitive interface, Google Tag Manager (GTM) saves both marketer’s and developer’s time. We’ll review set up a GTM account, how to make your initial tags and triggers and use the platform to speed up the tracking setup process in this article.
Understanding Google Tag Manager Hierarchy
In the hierarchy of GTM, the account is at the top. You should typically create one account for each brand you work with and a container for each website the brand utilizes if you’re managing GTM from an agency login. By using the same Google login, you can access several accounts.
A container comes with a special GTM code that you should apply to every page of the website you want to track.
Then you will configure tags that activate tracking codes on your website within each container. When tags fire, the trigger determines it. Variables are tools you can use to specify more precisely when tags will fire.
Account Setup
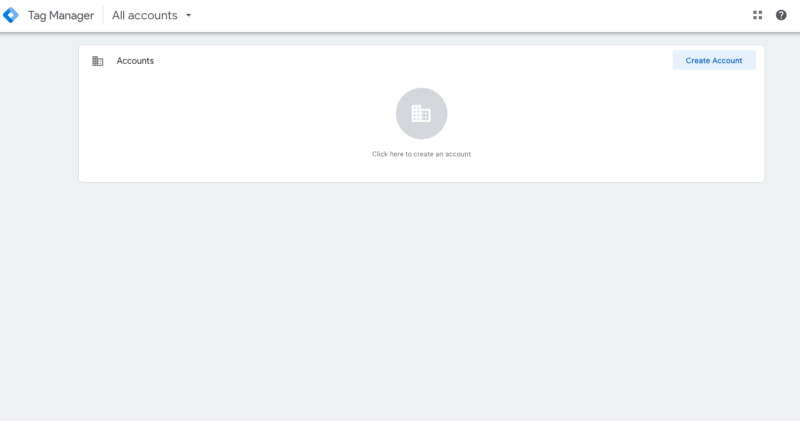
To begin account setup, go here and click “Start for Free.”

There should then be a screen where you create an account.
Select the platform and provide the necessary information in the forms. While we focus on utilizing GTM for the web in this tutorial, you can also create accounts for applications and AMP (Google’s foundation for mobile pages).
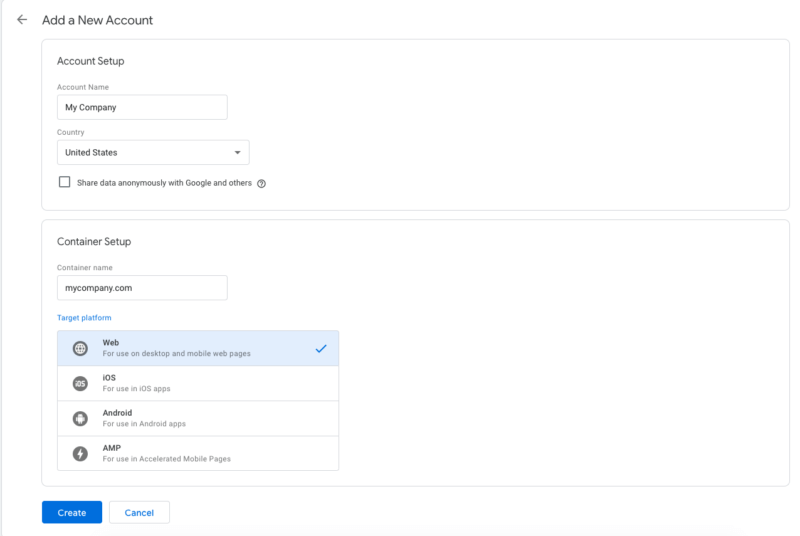
Once you click Create, the GTM code will appear for you to add to the website. Add the first code within the head> and the following code just after the opening body> tag on your website if you feel comfortable altering the source code, or have a developer install the codes.
Setting up tags
GTM includes several built-in tag templates for major analytics and ad platforms. These include Google products such as Analytics, Ads, Optimize and Surveys, as well as several third-party platforms, such as AdRoll, Microsoft Advertising, LinkedIn and Quora. If a tracking tag doesn’t have an existing template, you can also use a Custom HTML or Custom Image tag.
To create your first tag, click “Add a new tag” from the Overview screen.
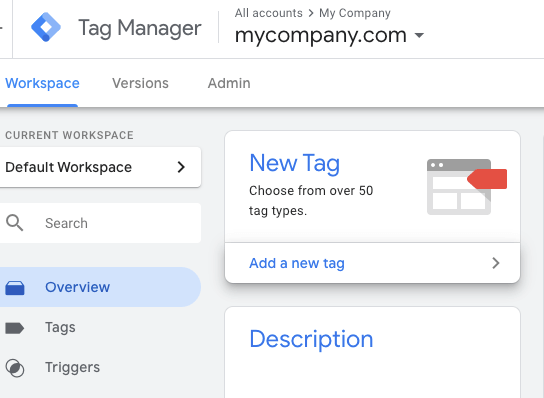
You may now begin to specify the requirements for your tag.
Add a name to the field at the top. Make sure to consider naming standards that will make it simple for you to keep track of several tags. The name of the platform connected to the tag should come first, then its type and special requirements.
For instance:
- Google Ads – Conversion – Brochure Download
- Google Ads – Conversion – LP Lead
- Google Ads – Remarketing
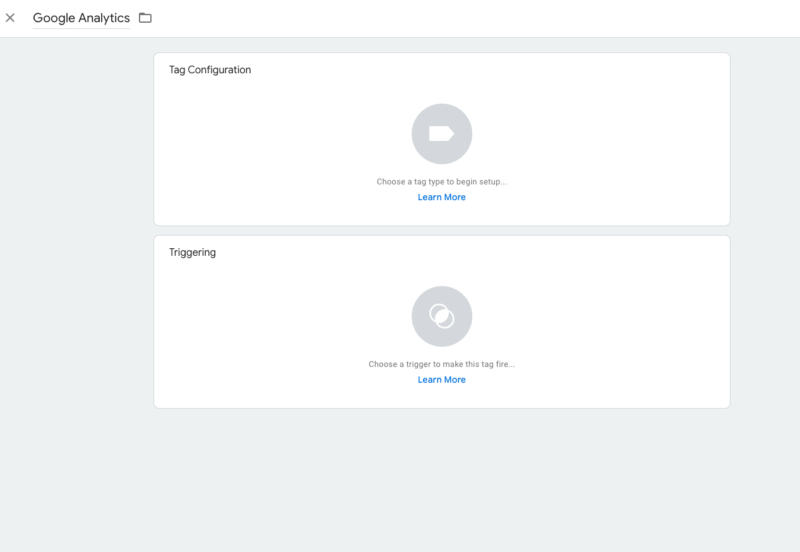
You can select the tag type by clicking inside the “Tag Configuration” box. You can either click the magnifying glass to search by name or scroll through to find the tag you’re looking for.
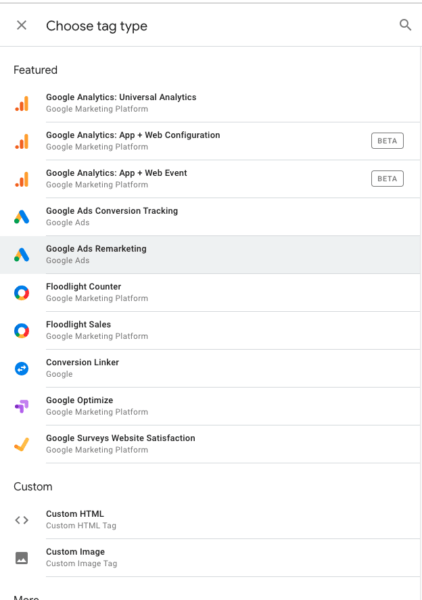
You’ll see fields that have been tailored for the associated platform once you’ve chosen your tag. The criteria can then be filled up.
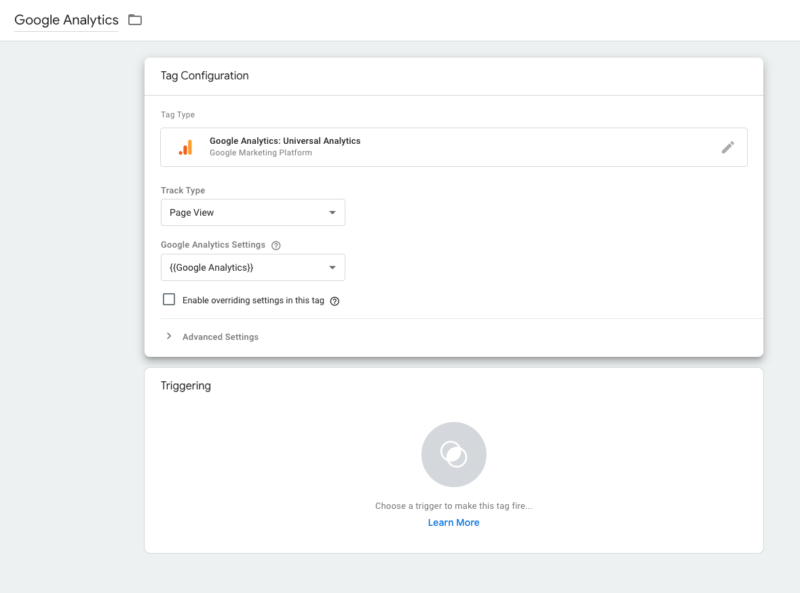
You must typically obtain an ID number for each template from your analytics or advertising platform and you can then modify what you wish to track using the other fields.
Have the tracking tag code but can’t find a template? Paste your code into the text box after selecting the Custom HTML tag type.
Configuring triggers
The Triggering box is where you can select a trigger that will make your tag fire. Pageviews, clicks, element visibility, form submissions, time spent on the site, custom events, and more activities can serve as triggers.
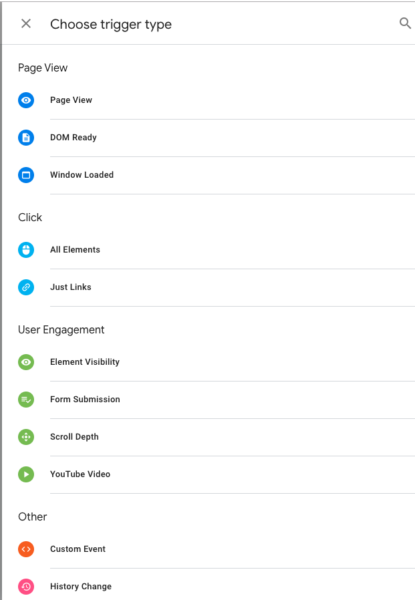
Select the trigger you’d like and then use the fields to specify criteria.
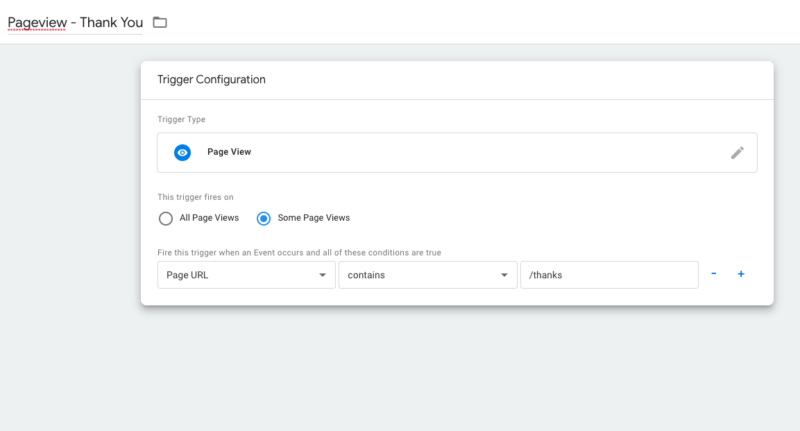
For instance, when the /thanks URL is viewed, this pageview trigger will activate. You can also include numerous conditions, all of which must be met for the trigger to activate. For instance, you could only want to fire a tag when a user views a particular page and completes an action on it.
Next, you can setup your variables, go-live and start tracking. After go-live, you can begin to streamline your results.
For more about Google Tag Manager, click here to schedule an appointment with Fair Marketing today.